Raster data like digital elevation models (e.g. SRTM), bathymetry (e.g. GEBCO), and gravity (e.g. Sandwell and Smith) can provide valuable context to an area. Since only so much subsurface analysis and interpretation can be done in GIS, getting these rasters into other applications, like GeoFrame, Petrel and Petromod, is important to give wider context to seismic, well and other subsurface data.
Fortunately, you can do this data transfer without expensive ‘middleware’ applications. All it requires is the ArcGIS Spatial Analyst extension, one of several ArcGIS Desktop extensions that extend the base functionality.
In this blog I’ll demonstrate how to export SRTM elevation data (stored in raster format in ArcGIS) to a table containing x,y and z values of the centre points of the cells, which can then be imported into another application.
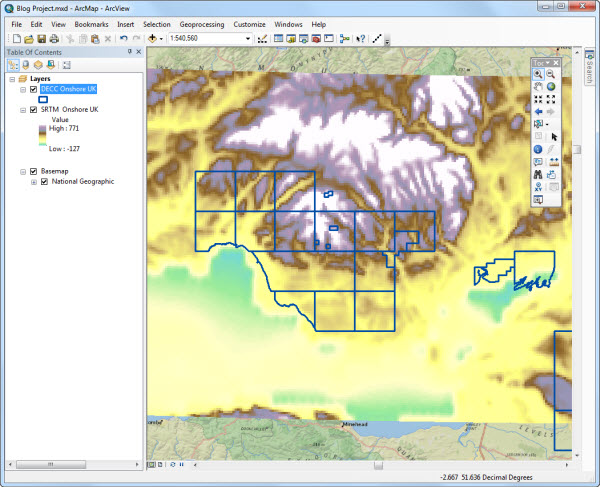
Let’s assume you have a fairly coarse SRTM raster in ArcMap, along with some DECC onshore licence blocks giving context (in this case, the South Wales coal basin). You wish to export part of the raster to another application – you can do this using an xyz format file, as follows:
1. Turn on the ‘Spatial Analyst’ extension from the ‘Customize > Extension’ menu.
2. Zoom in to the area you want to export.
3. Open ArcToolbox. Expand the ‘Spatial Analyst Tools’ toolbox and open the ‘Extraction’ tool set. Double-click the ‘Sample’ tool to open it. This tool creates a table containing values of cells from a raster for defined locations. If you use the SRTM raster as both the input and the defined location, you can create an xyz table for the raster.
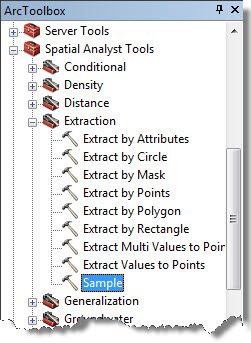
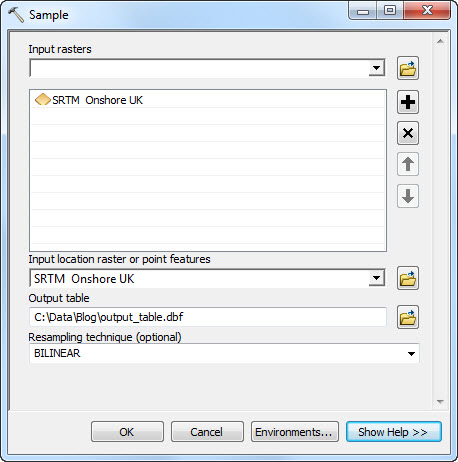
4. Fill in the inputs required by dragging and dropping from the Table of contents, or selecting from the drop-down lists, as follows:
5. Specify the SRTM raster as the ‘Input Raster’, and the same raster again as the ‘Input location raster or point features’.
6. Set the resampling technique to ‘BILINEAR’ (the preferred method for elevation).
7. Specify an output table name and location. Add the extension ‘.dbf’ to save it as a DBF format table that can be edited later in a spread sheet application.
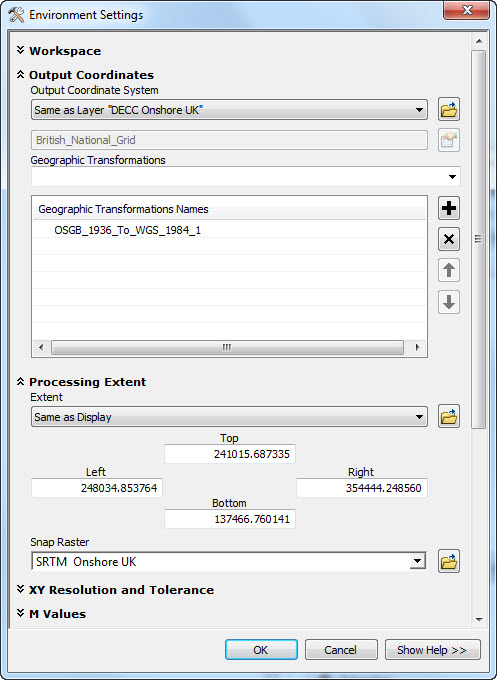
8. Before running the conversion, you can alter a couple of settings to ensure you export exactly what you want. Click on the ‘Environments’ button at the bottom of the dialog.
9. Expand the ‘Output Coordinates’ section to change the coordinate system of the data to be exported to ensure it matches interpretation application project. If your input raster is in a geographic coordinate system (as is often the case for global-scale datasets like SRTM), bear in mind the output will be in longitude / latitude rather than X / Y. Note that if you convert the data to a different datum, you also need to set the transformation parameters.
10. Expand the ‘Processing Extent’ section and specify the output extent required. Choose ‘Same as Display’ to export only what you see on the map.
11. Next set the ‘Snap Raster’ to the input raster, to ensure the output aligns correctly with the centre of each cell.
12. Click ‘OK’ to close the ‘Environments’ dialogue, and ‘OK’ again to run the tool. Depending on the size of area being exported, the tool may take a little time to run. Once complete, a DBF table should have been created.
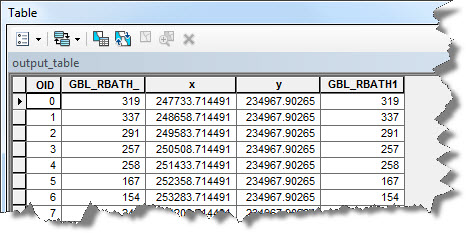
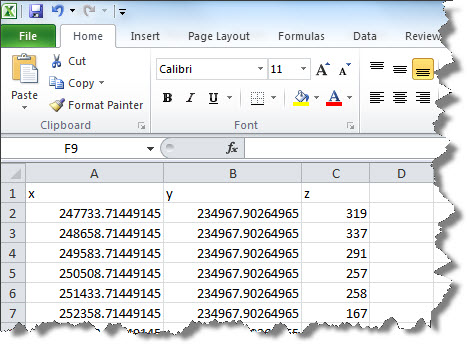
13. Open the DBF in a spreadsheet application like Microsft Excel (make sure you don’t have it open in ArcMap at the same time) to rename the columns as required and save the file in CSV or ASCII format for importing into your interpretation application. Because you used the same raster for both input parameters the z value field is duplicated. As such the first instance of this can be removed, to leave just fields for x, y and z.
An alternative method would be to export the raster to a point feature class, add xy values, and export the attribute table to a DBF. This often takes longer than the method described above, as creating a point feature class requires some processing time.
Posted by Ian Peebles, GIS Consultant, Exprodat


