We spend a lot of time working on our GIS analysis and then creating maps of our results. Eventually we need to do something with our map: present it; get it into a document; send it to another user.
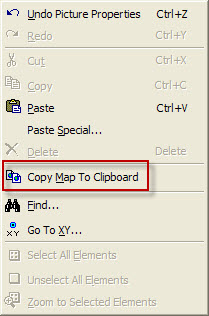
In ArcGIS Desktop (ArcMap) we can make a simple map output by using the menu option Edit > Copy Map to Clipboard, and then pasting the clipboard contents into another software package, such as PowerPoint. This is a great way to provide a quick snapshot of our current map area.

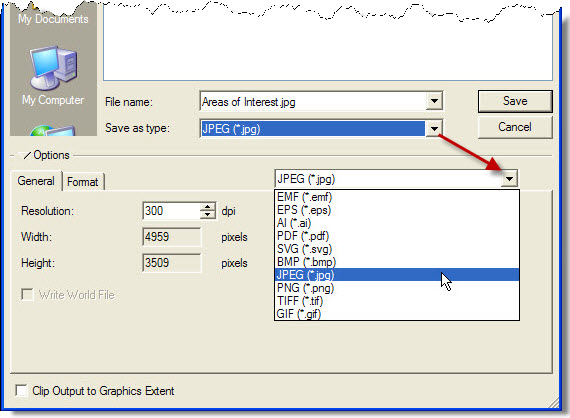
For making a better quality output of the map, we need to export it. ArcMap can export data to a variety of formats including EPS, EMF, JPEG, TIFF, PDF etc. The selected format should be determined by how the map is to be used outside of ArcGIS Desktop.
The export option is available from the menu item File > Export Map.

The level of quality can be improved by changing resolutions, so it is worth experimenting by producing images at different resolutions (measured in dpi, or dots per inch).
Of these options, image formats (e.g. JPEG and TIFF) are particularly useful for embedding into Microsoft Office products such as PowerPoint and Word, as well as most other documentation and presentation packages.
However, as with all the image export options, the exported file remains in a ‘dumb’ format without any geolocation information.
GeoTIFF files
A GeoTIFF, as the name suggests, is a TIFF containing additional geospatial information. This is a format that can imported directly into many E&P packages.
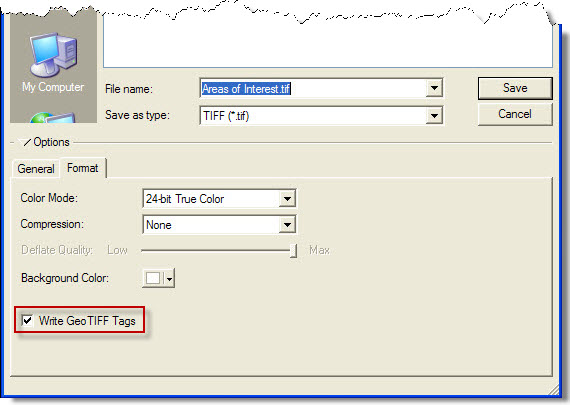
To create a GeoTIFF ensure that you are in Display view. Choose File > Export Map and select the TIFF (*.tif) option. Select the Format tab at the lower left of the dialog and check the Write GeoTIFF Tags check box.

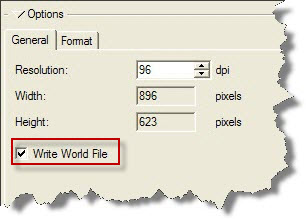
Now switch to the General tab and tick the Write World File check box.

Click ‘Save’ to export the file as a GeoTIFF. Again, make sure you choose an appropriate image resolution.
Note that you can also export a map to PDF, and this will be a topic of a future blog tip.
Posted by Mike Phillips, Senior Consultant, Exprodat.


