Although there are numerous formats for exporting your finished map to, Portable Document Format (PDF) files are possibly the most useful. These files allow users to share high quality cartographic outputs with both a level of security and some flexibility of display. It is also a popular format for delivery to commercial printers, for sharing documents and for the production of in-house reports.
Here is a simple process you can follow to create a PDF export of your map:
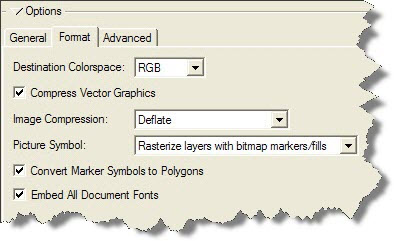
From Layout view select Export Data. Select PDF (*.pdf) and then the Format tab. Make sure that the check boxes for Convert Marker Symbols to Polygons and Embed all Document Fonts are ticked. This can be important when sending these files to 3rd parties as objects such as north arrows are ESRI fonts, and if these fonts are not installed at the destination location font substitutions may produce unexpected results.
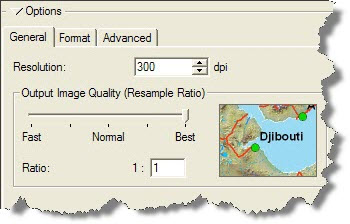
In the General tab, set the default resolution to either 300 dpi or 600 dpi.
There is also an Advanced tab containing the Layers And Attributes option. Tick the check box for Export Map Georeference Information if you wish to create a GeoPDF (similar to a GeoTIFF) with coordinate details retained in the export. If you do not want the layers in your ArcMap table of contents to be created as separate layers in the exported PDF, choose the None option.
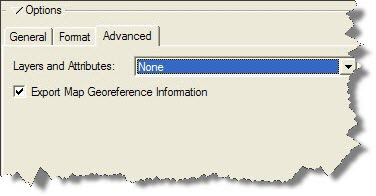
If you want your PDF to contain layers for most of the ArcMap layers, page elements, and other elements of your map, select the Export PDF Layers Only option. If you want to include both features and attributes in the PDF, select the Export PDF Layers and Attributes option.

Note that exporting attributes to PDF can result in performance problems in compatible PDF viewers. If possible, limit exported fields to one layer per map. To suppress field export for a particular layer, turn off field visibility in the Layer Properties dialog box.
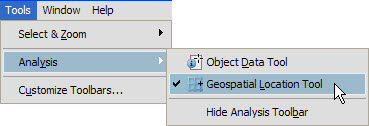
To test your result, load the new PDF (GeoPDF) into Adobe Reader and zoom in to see if the map resolution has been retained and is detailed enough for your needs. From the Adobe Reader menu select Tools > Customize Toolbars to open More Tools. Then, in the Analysis Toolbar group tick the check box next to Geospatial Location Tool.
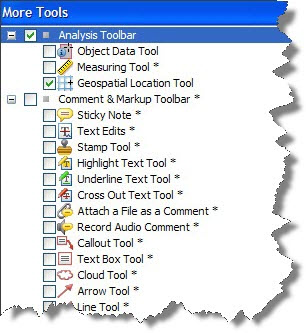
Then from the menu, select Tools > Analysis > Geospatial Location Tool
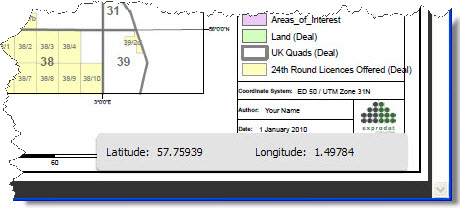
Moving the cursor around the map displays geospatial location as coordinates, in the bottom right of the map.
Check back with this site soon for more tips that we think GIS users in the oil and gas industry will find interesting.
Posted by Mike Phillips, Senior Consultant, Exprodat.


