In a previous Training Tip blog (“Hyperlinking to Document Pages)” we discussed how to link features in ArcMap to external documents such as PDFs, and launch them using an appropriate viewer application. If you are interested in viewing data such as seismic sections, which are stored as images, it is actually possible to do this within ArcMap itself by using the Raster attribute data type.
Add a Raster field
To add a Raster field to your attribute table:
1. Select Add field from the Table Option menu in the Attribute Table of the layer which will contain the Raster field, or
2. Add a new field in ArcCatalog, using the Feature Class properties menu – click on the Fields tab and add a new entry at the bottom of the list:
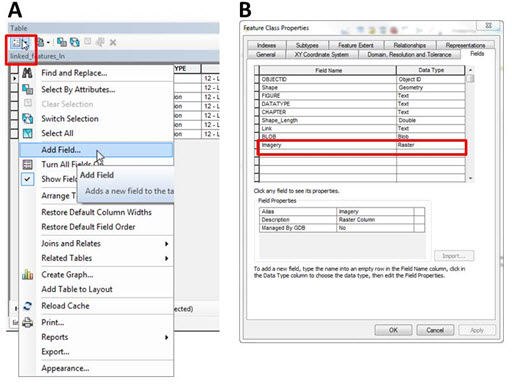
Once you have added the field you will need to set up some properties for the new field:
1. Select Raster as the data type:
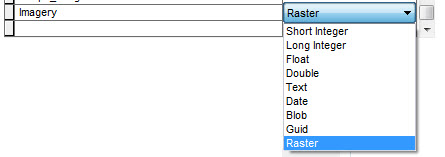
2. Decide whether the images will be managed in a geodatabase or not:

– Choose Yes if you want the images you select to be copied into the geodatabase in which your feature class resides.
– Choose No if you want the images to remain in their original location.
Load some images into your new field
1. In ArcMap, start an edit session by clicking on the Editor Toolbar > Start Editing:

2. Open the attribute table for your feature class and click in the Raster field (which is called Imagery in this example) table cell of the row you want to add an image to.

3. To the right of the cell, there will be a button with a greater than sign on it. If you click on this a panel will open, which suggests that you ‘right-click to load a raster dataset’ – if you do so, another menu pops up, which we’ll call the Raster field options menu – select Load…. This slightly odd-seeming workflow does have a reason, as we’ll see in a later point.
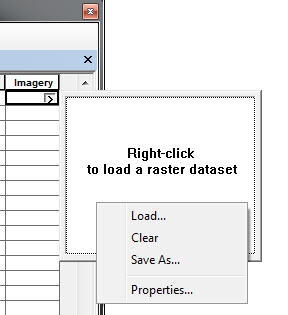
4. A file browser will appear – use it to navigate to the location of the image, select it and then click Add. The text now appears in the table cell.
5. The purpose of the panel now becomes clear – it serves to display the image file, as you’ll see if you click the button now that you’ve added an image:

6. You still have access to the Raster field options menu (right-click on the image); select the View option to open the image in a viewer hosted within ArcMap. You can increase the size of the viewing window; zoom in and out of the image; and view the image’s properties.
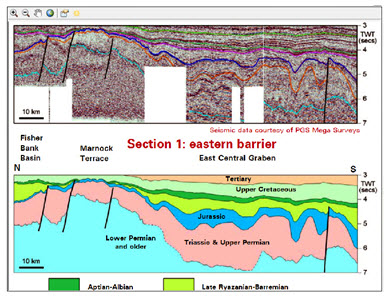
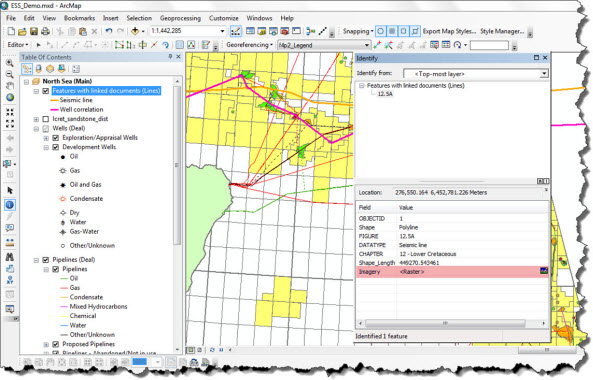
7. You can also access the image from the Identify tool:
a. Click on a feature which has a populated Raster attribute with it.
b. The identify results will include the Raster attribute field (highlighted in pink in the screengrab below).
c. Click on the image icon to open the Raster Viewer window to display the image.
![]()
Other considerations
Only one Raster field can be added to a feature class, but additional Raster fields can be stored in tables joined to the feature class.
Raster fields are not supported for shapefiles, so you will need to use a hyperlink if you wish to add image links to a shapefile.
The Raster field type supports most image of the formats supported by Esri, but Esri recommends that only ‘small pictures’ are used (sadly they don’t define what they mean by ‘small’ in this context).
If you opt to use managed Raster fields, the image you select will actually be loaded into the target geodatabase.
Posted by Devlyn Robson, GIS Trainer, Exprodat.


