Build once, process many!
In a previous blog it was discussed how you can use ArcPy to perform batch geoprocessing instead of using the ‘batch’ option for a tool. There is however a 3rd way you could consider that is far quicker than using the ‘batch’ option, plus you don’t need to know any Python!
If you wish to speed up a workflow by automatically repeating a process on many different datasets you can use one of the iterator functions in ModelBuilder. Iteration means ‘looping’ so by using one of these you can run an entire model or individual geoprocessing tool repeatedly on multiple datasets at the click of a button! For example if you need run through a hydrological flow modelling workflow for different study areas then using a ModelBuilder Iterator would be ideal for performing the task in a quick and efficient way.
Let’s look at a common E&P data management example:
You have received shapefiles from a data vendor in a world geographic projection system (WGS84) but you need all of your data to be in a local projected coordinate reference system (ED50 UTM31N) and saved as feature classes in your project geodatabase.
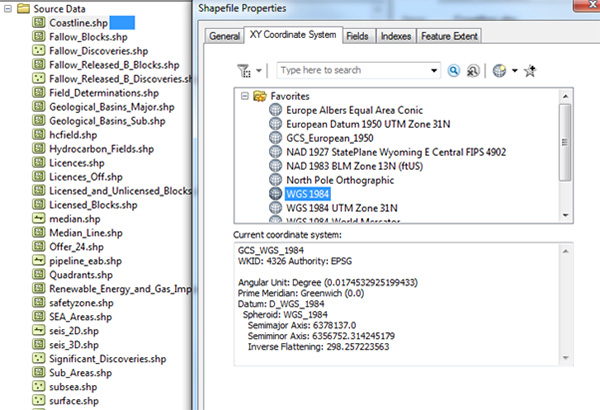
Five Steps to Success!
Step 1
In ArcCatalog open up ModelBuilder and select the iterator you require from the Insert menu. In this example we have chosen Iterate Feature Classes as the source datasets are shapefiles. If you were reclassifying raster datasets for example you would choose the Raster iterator. You can refer to this quick tour of using iterators from the ArcGIS Desktop help for a list of the different iterators and how they work.
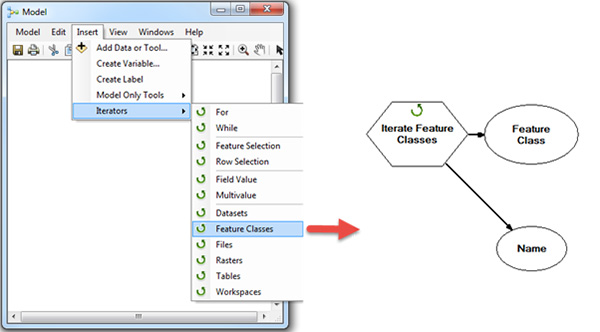
Key point – you can only use one iterator per model
Step 2
Double click the Iterate Feature Classes tool and browse to the Workspace or Feature Dataset where your source data is stored. You also have the option to type in a wildcard or choose a specific feature type (point/line/polygon) to filter the datasets that will be input into the model. If you tick Recursive the iterator will also iterate through any sub folders in the main workspace.
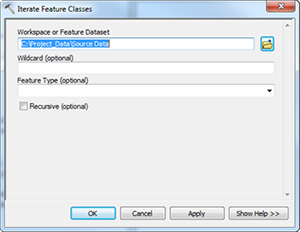
Step 3
Add or drag and drop the Project tool into the model from ArcToolbox and use the Connect button ![]() to create a connection between the green output oval from the iterator and the Project geoprocessing tool.
to create a connection between the green output oval from the iterator and the Project geoprocessing tool.

Step 4
Double click on the Project tool and fill in the parameters:
- You must specify the Output Dataset or Feature Class so navigate to your geodatabase where you want your outputs to be saved and type in the replacement string %Name% for the Feature Class output name – this will ensure that you won’t end up with one output and that all of your output datasets will be given the same name as the original input source shapefiles. You can optionally type in a prefix or suffix i.e. %Name%_ED50_UTM301N to ensure your output files are given a different name.
- If you choose to output a shapefile rather than a feature class and you wish to add a prefix or a suffix to the output name then you need to use the Parse Path tool to use the original shapefile name without the .shp extension included – Parse Path is a Model Only Tool, accessed from the Insert menu.
- You must also specify the output coordinate reference system and choose an appropriate Geographic transformation – remember you only need to set a transformation when source and target coordinate reference systems reference different datums.
- You don’t need to specify the Input Dataset or Feature Class as this is fed in automatically from the iterator.
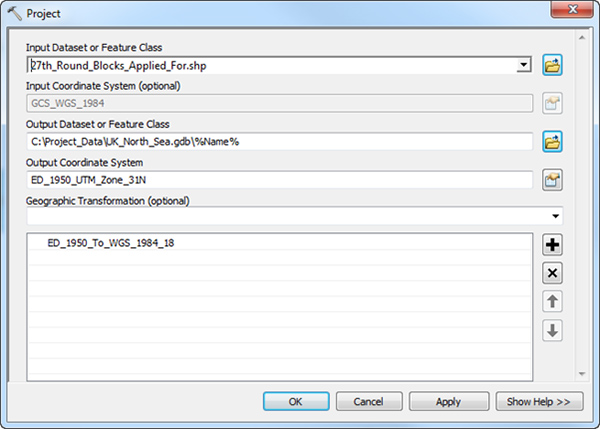
Step 5
You are now ready to run your model. Click the Validate Entire Model button and then click the Run button and wait for the model to run through the processes.

Check your results
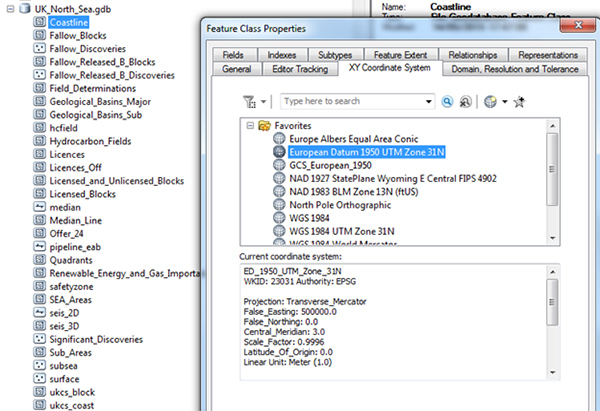
Navigate to your project geodatabase and check that it now contains all of the data you specified in the correct CRS. Save your model in a toolbox if case you wish to use it again.
Posted by Fiona Buckingham, GIS Trainer, Exprodat.


